
Shell Wather Detector

-
Shell Water Detector is a device to determine the presence of water in JetA1 fuels of undissolved water finely dispersed in concentrations lower than those normally detectable by visual examination. This of course affects water dispersions of this type resulting in emulsification of a water / fuel mixture during pumping, or precipitation of dissolved water due to a drop in fuel temperature.
That is why the Shell Water Detector was manufactured by achieving and following strict quality standards in a specifically constructed and moisture-controlled facility. The manufacturer has ISO 9001: 2008 certification for quality management, which covers manufacturing, assembly, packaging and supply.
The Shell Water Detector is tested and now comes in a more user-friendly packaging, which is designed to further improve the quality assurance of the product. This is great because it allows the user to use it without the need for an installation or qualified personnel.
Did you know that? For more than 50 years, operators around the world have relied on the Shell Water Detector to verify their aviation fuel for suspended water that can not be detected by visual inspections. The detector capsules are widely used, thanks to their efficiency and simplicity.
Do not wait any longer this is an effective solution at the best cost.
-

Each in-service tank daily

Each filter drain (hydrant filter/loading filter) daily

All fueller and trailer tanks daily and as per JIG 1 5.3.1
Each fueller filter drain daily and as per JIG 1 5.3.1

Each hydrant dispenser daily and as per JIG 1 5.3.2
-

1. Check the Equipment
- Check the tube expiry date.
- Ensure that the sample jar is clean and free from water.
- Check that the 5-ml (0.2-fl-oz) syringe operates freely and that the nozzle is undamaged.

2. Fit the Capsule
- Remove a capsule from the tube. Do not touch or allow any moisture onto the yellow paper of the capsule.
- Close the tube to protect the remaining capsules from the ambient humidity.
- Check that paper is uniformly yellow. If it is not, use another capsule.
- Fit the capsule to the syringe with the plunger ready for use.

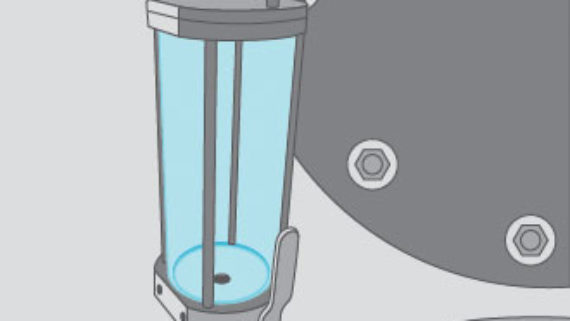
3. Draw a Sample
- Use the sample from the visual “clear and bright” check you have just completed.
- If you do not already have the sample, follow the visual inspection procedures (ASTM D4176).

4. Immerse the Capsule In the Sample
- Ensure you are using gloves that are impervious to fuel.
- Immerse the capsule and about half the syringe in the sample and stir in a circular motion.

5. Extract the Sample
- Draw 5 ml of fuel into the syringe.
- Many operators favour a reverse action (single-handed) syringe, which draws a sample when the plunger is pushed, rather than a traditional syringe that needs holding in one hand while the other pulls the plunger.

6. Withdraw the Syringe and Examine the Capsule
- Withdraw the syringe from the fuel and examine the capsule immediately for any colour change in the centre-wet area.

7. Results
- The yellow wet area turns yellow–green in the presence of very low concentrations of dispersed water. The change to green becomes progressively more noticeable with increasing water content.
- No Change
- A few green speckles or a slight change in color
- Distinct color change
- Acceptable
- Trace
- Suspended Water
- If there is any colour change, test a new sample to ensure that the first capsule was not faulty. If there is still a colour change with the second and a third test sample, water is present in the fuel.

8. After Sampling
- Dispose of the used capsule safely. It can only be used once. Empty the contents of the syringe back into the sample container and return to the recovery tank. Complete the documentation.